
Does your group make the most of iPad apps for kiosk-style functions, or have you ever ever wanted handy a tool to another person to make use of an app or enter info with out giving them full entry? Apple’s Guided Entry accessibility characteristic is an answer for such situations that’s constructed into iOS and iPadOS.
Guided Entry permits a consumer to lock a single app on the display, stopping customers from returning to the Residence Display screen, opening one other app, activating Siri, or utilizing the {hardware} buttons with out coming into a passcode to exit Guided Entry.
SEE: What’s new in iOS 18.2?
Establishing Guided Entry
To allow Guided Entry, comply with these steps.
- Open the Settings app.
- Navigate to Accessibility.
- Choose Guided Entry.
- Allow the change for Guided Entry.
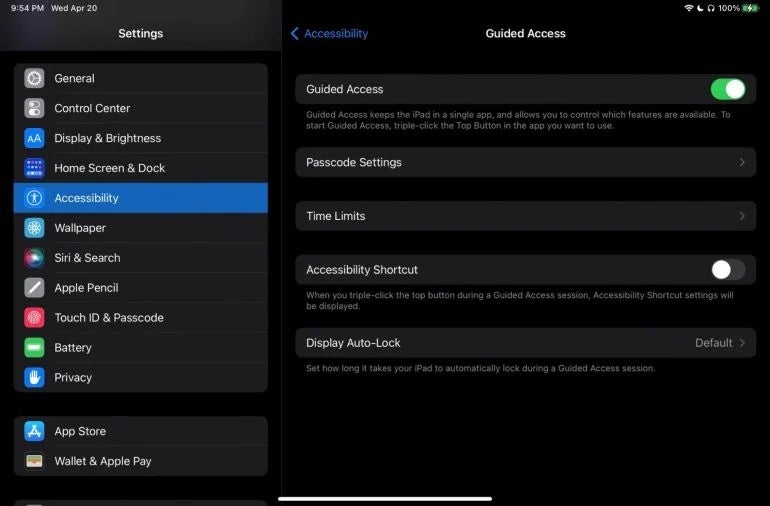
The accessibility shortcut lets you activate Guided Entry by clicking the iPad’s {hardware} button 3 times. On units with a Residence button, press it 3 times. On units with Face ID, press the facet or high button 3 times.
Activating Guided Entry
Earlier than activating Guided Entry, launch the app you’d wish to lock to the display, after which comply with these steps:
- Triple-click the Residence button in case your gadget has one, or the facet / high button on units with Face ID. The Guided Entry configuration panel will seem.
- Faucet the Choices button (backside left of the display) to allow or disable using high buttons, quantity buttons, movement, keyboards, contact or dictionary lookup, or set a time restrict for Guided Entry.
- Faucet Begin to start. As soon as activated, the iPad will stay locked to the chosen app, stopping entry to different options.

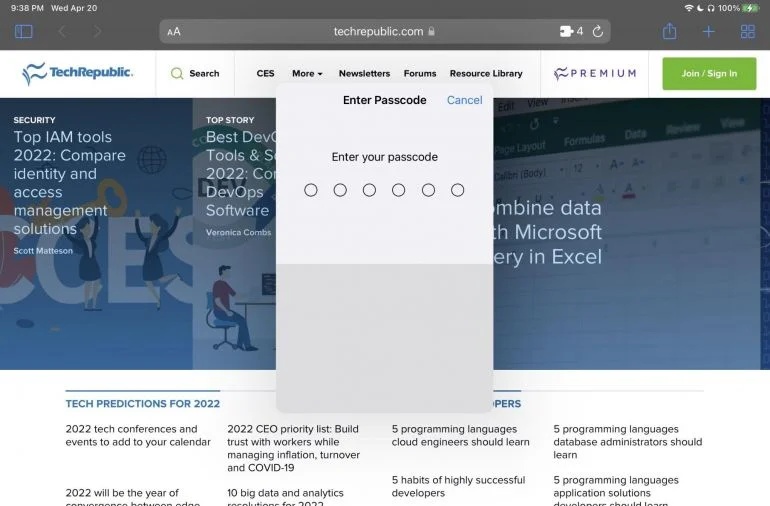
Deactivating Guided Entry
If you’re able to disable Guided Entry, comply with these steps.
- Press the identical button you used to activate it 3 times.
- Enter your password or authenticate with Contact ID or Face ID. This may show the Guided Entry setup view the place you initially activated the characteristic, besides the Cancel button has now turn out to be an Finish button, permitting you to fully finish the accessibility characteristic when tapped.
How do I limit apps on my iPad?
If you wish to limit apps so youngsters or different customers can solely entry sure options, you will have a special menu from the one the place the kiosk mode setting resides.
To make use of parental controls to lock particular media companies, go to Settings > Display screen Time > Content material & Privateness Restrictions > App Retailer, Media, Internet, & Video games.
How do I put a password on my iOS app?
Some builders permit customers so as to add password entry inside their apps; nevertheless, Apple supplies another technique by way of Display screen Time.
Go to Settings > Display screen Time > App Limits > Add Restrict. Choose the class of apps or particular app to restrict. Choose Subsequent. Display screen Time locks an app utilizing a password after a set period of time, so choose the shortest time span (1 minute) or select a time-frame. Lastly, choose Block At Finish Of Restrict.
By understanding lock apps on an iPad, you’ll be able to stop unauthorized entry to delicate apps and preserve management over gadget utilization.
TechnologyAdvice workers author Megan Crouse up to date this text.


